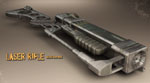
 In the modeling tutorial for 3ds Max called „Modeling a Laser Rifle in 3ds Max“ I showed you how to model a fancy laser rifle using reference pictures and poly-editing techniques. Now, after a long time we finally releasing the texturing part of this tutorial which will bring your gun to life. In the tutorial we will start by rendering simple references of the main body of the laser rifle which we will after import and use in Photoshop like a reference for fitting and adjusting the texture. We will create the texture from scratch, using some reference image and real world textures which we will combine to create realistic texture with all the small details for the laser rifle.
To make the texture looking old and used i will show you how to create fade, scratch and other effects just by using the right brush, blending option of a layer and some fantasy. After the Photoshop part will be done we will jump straight to 3ds Max and start to prepare the materials for the laser rifle. As a start material i will use a matte metal which we have inside our 3D-Sphere Material Library and will tune the properties a bit to achieve the desirable effect. For the rendering part i will use MentalRay and Photometric Lights for realistic looking result. At the end we will render Ambient & Occlusion map and do some postproduction in Photoshop. Below you can watch the tutorial and the download links are at the bottom of this article.


- Creating textures in Photoshop
- Together with diffuse map also bump map
- Using different brushes in Photoshop
- UV Mapping an Object in 3DS Max
- Materials using Arch&Design
- Lightning using MR Photometric Lights
- Rendering, Ambient & Occlusion
- Postproduction in Photoshop
- 03:30:00
- 3ds Max 2012
- Photoshop (optional)